I recently spawned a Virtual private server(VPS) with public IP and thought everything was done and started working on my application. Then I observed that /var/log/auth.log was growing fast, which made me curious, and I opened the /var/log/auth.log file and noticed that someone was brute-forcing to SSH into my machine. At this moment, I learned that bad guys (with bots) are continuously trying to brute force their way into any server with a weak ssh-password-based authentication enabled. There were two types of brute-forcing happening on my server:
- Guessing the root user password.
- Guessing username and their passwords. E.g., admin/admin, user/pass etc.
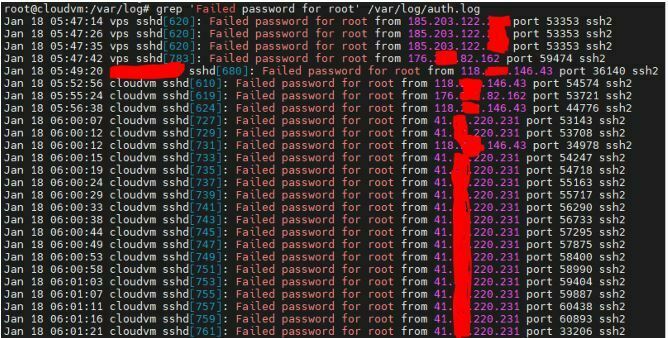
Here is a short snippet from my VPS:
Luckily, I realized this soon enough and spent some time securing my VPS. Here is a list of tasks I performed. If you plan to follow along, make sure you do not close the connection before ensuring ssh connectivity via a new terminal session. However, changes will not take effect before reloading sshd.
Assuming you have freshly created the VPS/Linux machine/server.
1. Disable root user login
The “root“ user is the only username present on pretty much every machine. Meaning, Bots don‘t have to guess the username. Unfortunately, this makes root users vulnerable to such attacks.
Steps:
As a root user, open /etc/ssh/sshd_config using vim. Make sure the following line is present:
PermitRootLogin no
DenyUsers root
2. Change SSH default port.
Bots are just the programs that work as told by their evil masters. They typically look for port 22(default SSH port); if we change the SSH port to something else like 3333, we can cut off all the dumb bots still looking for port 22. This step does not protect us but hides us from the evil guys.
Steps:
As a root user, open /etc/ssh/sshd_config using vim. Change the port from 22 to some other number.
Port 3344
3. Disable ssh password based authentication
Password–based authentication is weak. It is as strong as the strength of the password and the discipline of the user. Many password lists are floating in the wild, with millions of previously leaked passwords. What if your password is present in one of such lists? That will make brute–forcing easier. On the contrary, SSH key–based authentications are incredibly secure if users ensure private custody of their private keys(DO NOT SHARE THIS FILE TO ANYONE).
Furthermore, many proven algorithms make it nearly impossible to crack the key–based authentication. For example, some algorithms are Ed25519, SSH–RSA, etc. It would take several million years to crack the algorithm with consumer–grade hardware.
Steps:
As a root user, open /etc/ssh/sshd_config using vim. Disable the password–based authentication.
PasswordAuthentication no
4. Create a proxy user that is only allowed to ssh
Step:
root@cloudvm:~# adduser mysecretuser
Adding user `mysecretuser' ...
Adding new group `mysecretuser' (1001) ...
Adding new user `mysecretuser' (1001) with group `mysecretuser' ...
Creating home directory `/home/mysecretuser' ...
Copying files from `/etc/skel' ...
New password:
Retype new password:
passwd: password updated successfully
Changing the user information for mysecretuser
Enter the new value, or press ENTER for the default
Full Name []:
Room Number []:
ssh-keygen -t ed25519 -C mylaptop
Generating public/private ed25519 key pair.
Enter file in which to save the key (/home/mysecretuser/.ssh/id_ed25519): y
Enter passphrase (empty for no passphrase):
Enter same passphrase again:
Your identification has been saved in y.
Your public key has been saved in y.pub.
The key fingerprint is:
b3:15:1d:7d:e5:55:10:00:fa:60:49:77:26:77:63:54 mylaptop
The key's randomart image is:
+--[ED25519 256---+
| . +.*+B+E       |
| . + * +.oo      |
| = . . ..        |
| . o .           |
| S o             |
| +               |
| .               |
|                 |
|                 |
+-----------------+
→ssh-copy-id mysecretuser@MY-VPS-IP-ADD
The authenticity of host' MY-VPS-IP-ADD (MY-VPS-IP-ADD)' can't be established.
ECDSA key fingerprint is 25:28:95:08:ff:cd:d8:e0:29:db:08:04:b3:7b:78:47.
Are you sure you want to continue connecting (yes/no)? yes
/usr/bin/ssh-copy-id: INFO: attempting to log in with the new key(s), to filter out any
that are already installed
/usr/bin/ssh-copy-id: INFO: 1 key(s) remain to be installed -- if you are prompted now it
is to install the new keys
mysecretuser@MY-VPS-IP-ADD's password:

Number of key(s) added: 1
5. Add the proxy user to the list of allowed user
As a root user, open /etc/ssh/sshd_config using vim. Add the proxy user to the list of the allowed user to ssh.
Step:
AllowUsers mysecretuser
6. Keep a strong root password
Although direct root ssh is blocked, Keep a strong root password. If the private key of the proxy user gets stolen, someone can log in to the server and try to switch to the root user to gain ultimate control. This step is our final line of defense, and if the password is some default value, time to fix it.
7. Change the sudo configuration for proxy user
Typically, when we run any command with sudo, it prompts our password to establish our own identity. Here, if we change the behavior of sudo to prompt for the root password, then it will act as a 2nd line of defense. It means the user needs to have a private key to log in and know the root password to sudo anything. Example:
Following is the default behavior of sudo command, it establishes the identity of the current user. However, we will not give any sudo privileges to the proxy-user.
whoami
techie

sudo mkdir /foo/bar
[sudo] password for techie:<password-for-techie>
After implementing the below step, sudo would prompt for the root password.
techie@cloudvm:~$ sudo apt update
[sudo] password for root:<root password>
Step:
As a root user, type the following command, this command would open /etc/sudoers file
visudo
Please enter the following content in the file and save it.
Defaults targetpw
The above changes would force the proxy–user to provide the root password instead of their password to perform any sudo actions.
8. Install fail2ban
Steps:
Installation for Debian:
apt-get install fail2ban
service fail2ban status 9. restart sshd to apply changes
service ssh restart
10. Get comfortable with firewall rules
This is something that would not be needed for most users but it is very handy to know ufw commands. This provides users with more fine-grain control over the security.
Here are some sample rules:
root@cloudvm:~# ufw status verbose
Status: active
Logging: on (low)
Default: deny (incoming), allow (outgoing), deny (routed)
New profiles: skip
To Action From
-- ------ ----
443/tcp ALLOW IN Anywhere
3322 ALLOW IN Anywhere
53 ALLOW IN Anywhere
80 ALLOW IN Anywhere
Anywhere DENY IN 41.YYY.220.XXX
443/tcp (v6) ALLOW IN Anywhere (v6)
2233 (v6) ALLOW IN Anywhere (v6)
53 (v6) ALLOW IN Anywhere (v6)
80 (v6) ALLOW IN Anywhere (v6)
root@cloudvm:~#
In the above rules, you may notice that the default rule is to deny all incoming traffic and allow all incoming traffic. To set this up. First, disable your ufw firewall.
root@cloudvm:~# ufw disable
Firewall stopped and disabled on system startup
root@cloudvm:~# ufw status
Status: inactive
Now, set the default incoming to disable.
sudo ufw default deny incoming
Now start enabling the ports or services you want to open. Here is the syntax for enabling services(ssh in this case):
root@cloudvm:~# ufw allow ssh
Rules updated
Rules updated (v6)
root@cloudvm:~#
Here is the syntax for enabling the port:
root@cloudvm:~# ufw allow 2222
Rule added
Rule added (v6)
root@cloudvm:~#
Once the rules are added, enable the firewall.
root@cloudvm:~# ufw enable
Command may disrupt existing ssh connections. Proceed with operation (y|n)? y
Firewall is active and enabled on system startup
root@cloudvm:~# ufw status numbered
Status: active
To Action From
-- ------ ----
[ 1] 443/tcp ALLOW IN Anywhere
[ 2] 2233 ALLOW IN Anywhere
[ 3] 53 ALLOW IN Anywhere
[ 4] 80 ALLOW IN Anywhere
[ 5] Anywhere DENY IN 41.XX.220.YYY
[ 6] 2222 ALLOW IN Anywhere
[ 7] 22/tcp ALLOW IN Anywhere
[ 8] 443/tcp (v6) ALLOW IN Anywhere (v6)
[ 9] 2233 (v6) ALLOW IN Anywhere (v6)
[10] 53 (v6) ALLOW IN Anywhere (v6)
[11] 80 (v6) ALLOW IN Anywhere (v6)
[12] 22/tcp (v6) ALLOW IN Anywhere (v6) #delete this next
If you want to clean any rule, use “ufw delete ” command with the index of the rule.
root@cloudvm:~# ufw disable
Firewall stopped and disabled on system startup
root@cloudvm:~#
root@cloudvm:~# ufw delete 12
Deleting:
allow 22/tcp
Proceed with operation (y|n)? y
Rules updated (v6)
root@cloudvm:~# ufw enable
Command may disrupt existing ssh connections. Proceed with operation (y|n)? y
Firewall is active and enabled on system startup
root@cloudvm:~#